Klipper
Aug. 26, 2022, 2:20 p.m.Most of you have probably heard the word Klipper before, but I believe not everyone knows exactly what it is or how it even works. Klipper is a slightly different and better firmware for your 3D printer. The interesting thing is that it is installed on a different device than the printer itself. That device is most often a Raspberry Pi microcomputer. The computing load is thus shifted to the generally more powerful Raspberry Pi, and as a result significantly less demands are placed on the printer’s motherboard, since the printer’s motherboard only processes the commands calculated in the Raspberry. Thanks to this, you can turn even inferior printers with 8-bit motherboards into a better machine. But this solution also makes sense for powerful printers. In addition, the Klipper by its very nature offers very friendly remote control from a PC or mobile, which most printers basically cannot do.
I personally decided on the Klipper after not being satisfied with the available Marlin firmwares for my Creality Ender 6 printer. Printing via the Karmen Pill made the printer more usable in some ways, but it fell short of its predecessor, the Ender 3, in my favorite Vase mod .I also really disliked the complexity of any FW tweaks with the original Marlin firmware, something Klipper absolutely excels at. At the time of my switch to Klipper, Raspberry Pis were still widely available, so the transition was easier than now in mid-2022. I chose the Raspberry Pi Zero 2 W model, and in retrospect I have to admit that it was a good choice. The Klipper cost me about 600 CZK including cabling, which is a very low price for how big a step it was for the printer.
Since the Ender 6 printer is a bit specific, I followed the installation recommended by the community from https://3dprintbeginner.com/how-to-install-klipper-on-creality-ender-6/. They prepared a detailed installation guide not only for Ender 6, but also for other specific machines and motherboards, so I definitely recommend it. Installing Klipper starts with choosing the environment in which you want to control it. I chose the Fluidd environment. They have a lot in common with its competitor Mainsail OS and I don’t see much difference between them. The actual installation of Fluidd takes place on a computer, where the system itself is uploaded to a Micro SD card. The card is then configured to connect to your Wi-Fi network and you put the card into the Raspberry Pi. You connect the Raspberry Pi to the printer, it connects to Wi-Fi, and you can now completely control it remotely from a device connected to your network. The following is a complete firmware configuration to be compatible with your printer. After creating the FW, upload it to the printer and it’s almost done.
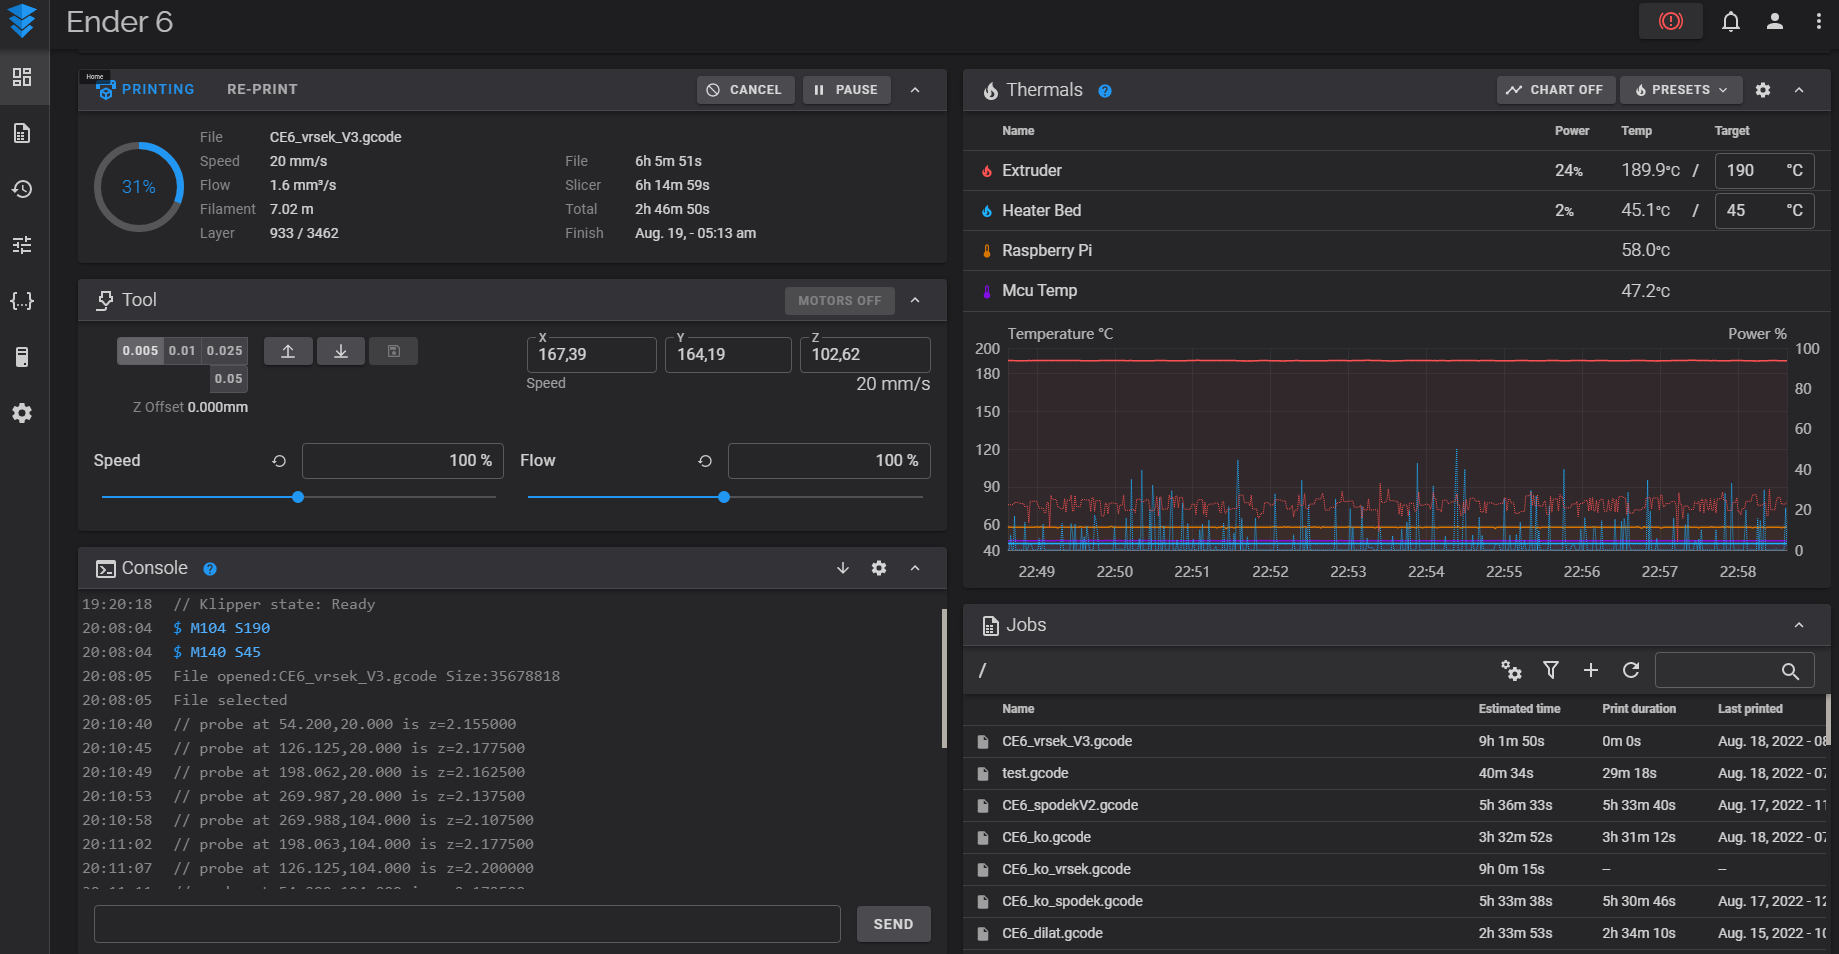
Figure 1 – Fluidd Environment
Figure 1 shows the Fluidd environment displayed on a PC in a browser. In the upper left part you can see the current printing status. We can find the percentage of completion, the current speed, the nozzle flow, the filament used. Then there’s estimated completion time, current print time, etc. Below that is a manual control panel, followed by a command console. In the right part there is an area for checking, but also for manual entry of temperatures, including graphs. During the actual printing, you can see in the control environment all the necessary data about the printer, such as required temperatures, measured temperatures, the current power of individual heating elements, etc. You can also clearly see an overview of the gcodes that you have uploaded to the Raspberry. Estimated printing times can be seen for them, and real printing time can be seen for those that have already been printed. These files can be simply dragged here from a folder on the PC or there is also an option to send files directly from the Cura slicer.
If you have created firmware, it is still necessary to set the configuration file printer.cfg in the control environment. In this Config, you can clearly find all the parameters of your printer and you can change them at will. Deploying new parameters is done simply by saving and restarting the FW. In other words, after changing any parameter, click on “Save and restart” and you can start printing with new parameters within 5 seconds. So you don’t have to compile the entire FW and re-upload it to the printer for every change. This configuration file can be exported as a text document and thus easily backed up.
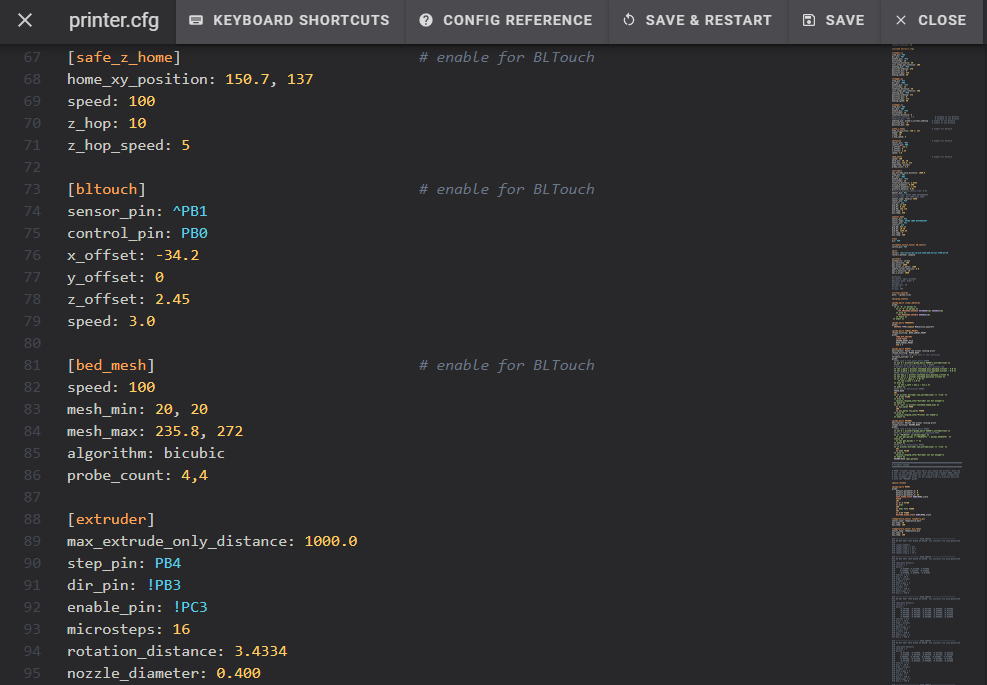
Figure 2 - Part of the configuration file
If you have a BLtouch or similar device, Klipper offers you, among other things, the option to make a Mesh bed. In other words, test the curvature of the pad in the required number of points. I perform such a test before each print using a macro that I run with a command in Start Gcode. The result is a graphic of the curvature of the pad, see Figure 3, according to which the bed can be adjusted. Of course, Klipper takes the curvature of the pad into account when printing and tries to compensate for it.
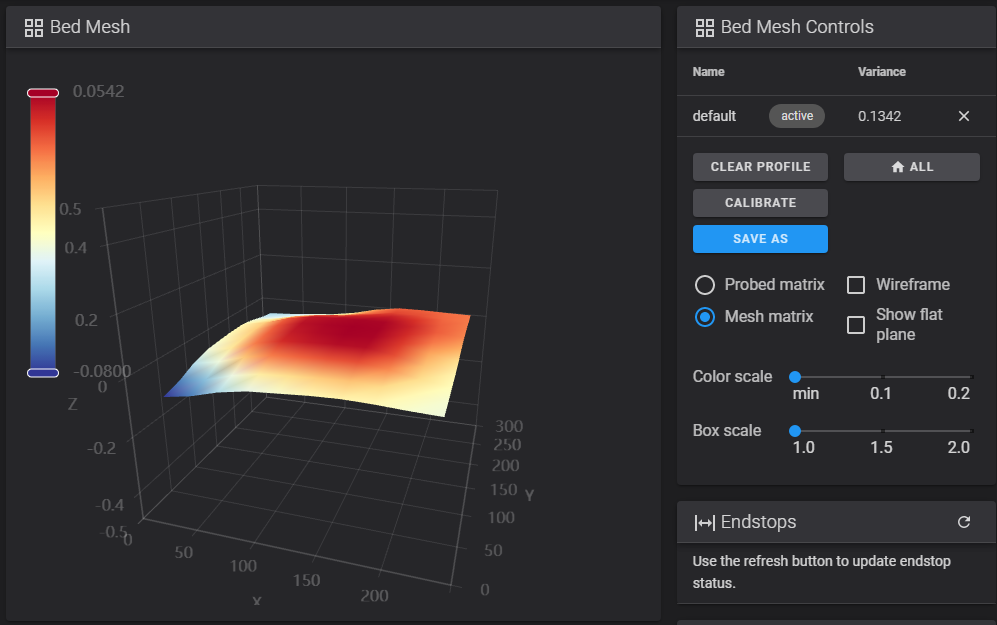
Figure 3 - Pad Curvature (Mesh 4x4 points)
After the printer has been completely set up, you can start printing. I personally did not have to make any changes to the settings in the slicer. The only thing I would recommend is to turn off the control of everything you can leave to Klipper. I’m talking about acceleration control, for example. Despite the fact that I had set the same acceleration in the Cura slicer as in Klipper, i.e. 3000 mm2/s, after turning off this control in the slicer, Klipper is able to reduce the printing time on my printer by tens of percent (approx. 10-40%). Another thing is the print quality. This increased while maintaining the print profiles in the slicer in the basic settings of Klipper.
If the speed and quality of printing are still not enough for you, Klipper offers many functions to help you. We will practically deal with them in the second part of the article about the Klipper firmware. In it, we will show various functions that, thanks to the computing power of the Raspberry Pi, can predict certain mechanical and physical ailments of the printer and compensate for them.
Lukáš Židek