PrusaSlicer and Karmen
If you use PrusaSlicer for slicing, you will certainly be interested in the fact that you can send your print files (Gcodes) from PrusaSlicer directly to Karmen.
This tutorial is made for PrusaSlicer version 2.5.2. If you have a different version, some steps may be different.
Tip: Karmen can also communicate with other slicers (Cura…). The setting is similar to the one below - if it doesn’t work for you, contact us.
PrusaSlicer settings
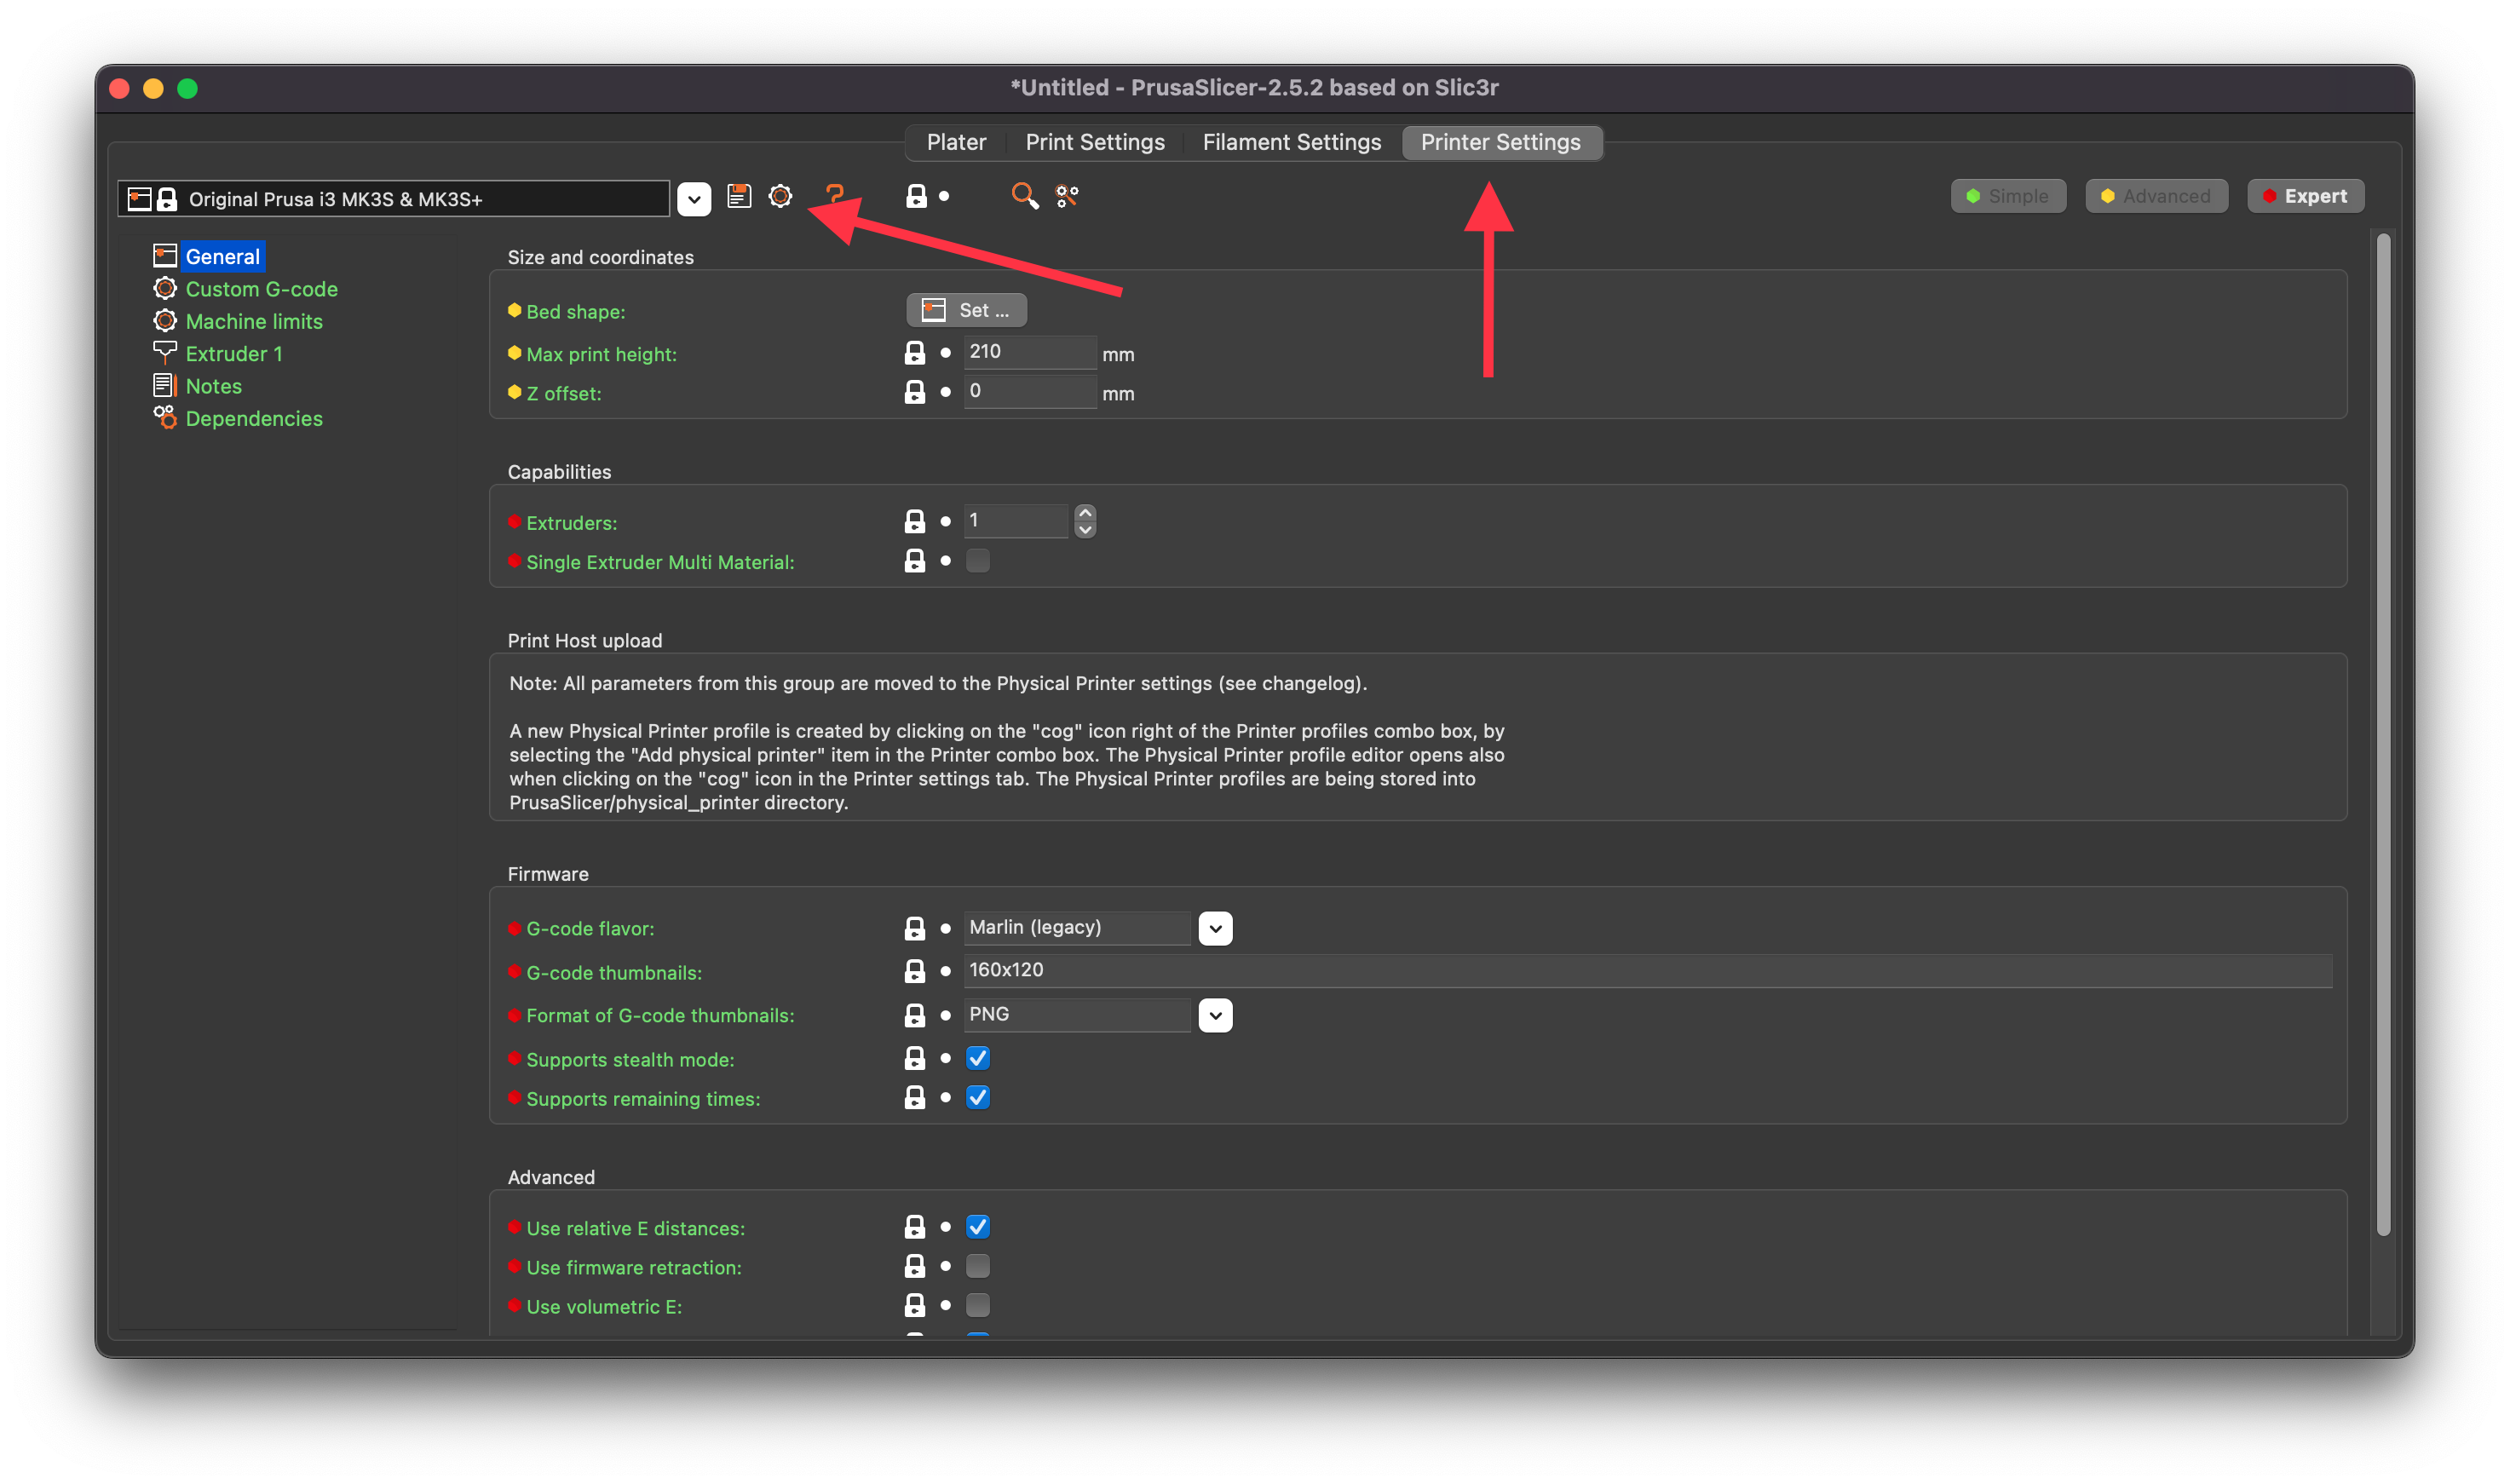
In the “Printer Settings” tab, click the printer settings icon:
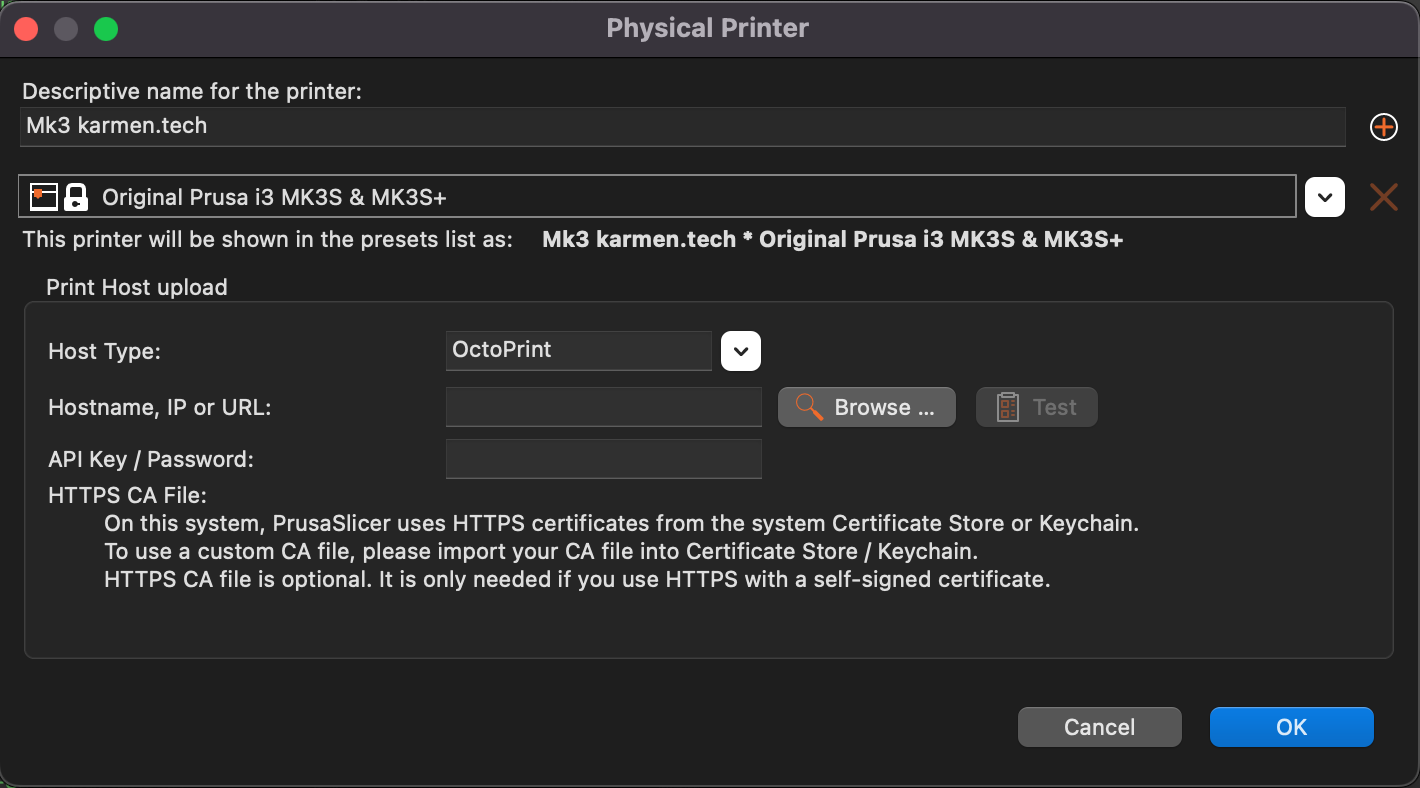
In the printer settings window, enter:
- Host Type:
OctoPrint - Hostname:
see "Octoprint Upload Url" in doc below- Octoprint server address - API Key:
the key you will create in one of the next steps- Create API token
Now switch to your broswer to next.karmen.tech to get needed URL and API Key.
Octoprint server address
Server address you can find in Settings-Your account
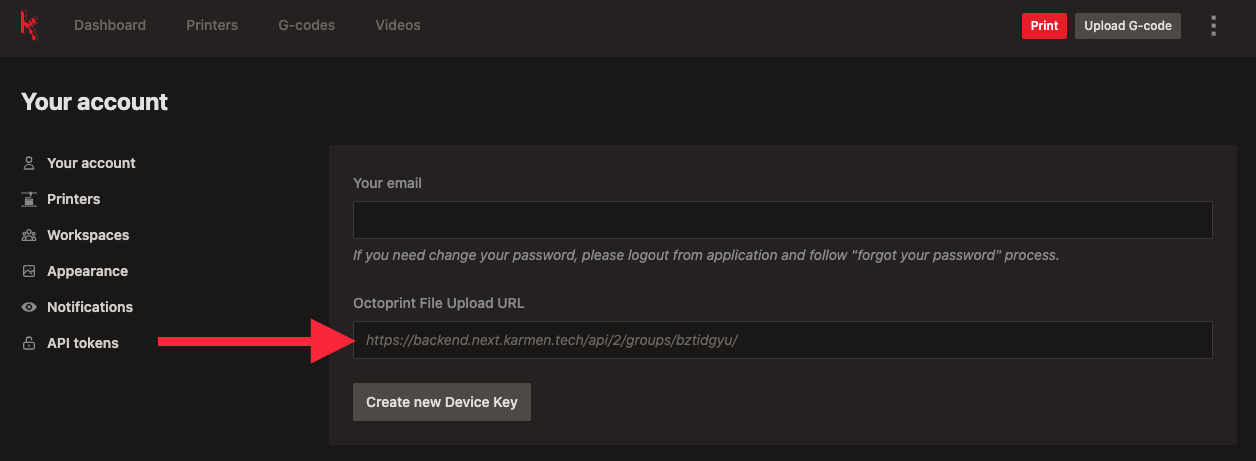
Copy File upload URL a paste into “Hostname, IP or URL” in PrusaSlicer.
Create API token
In order for PrusaSlicer to communicate with Karmen (send Gcodes), you must first generate an API key.
You create an API key in the settings in Karmen Cloud on the page Settings > API tokens.
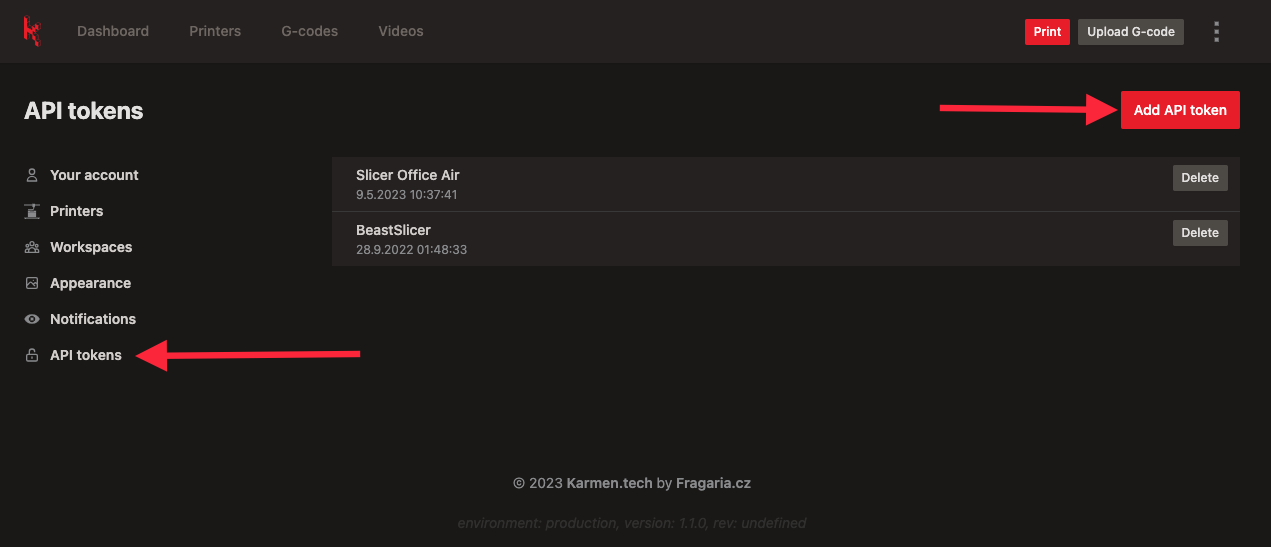
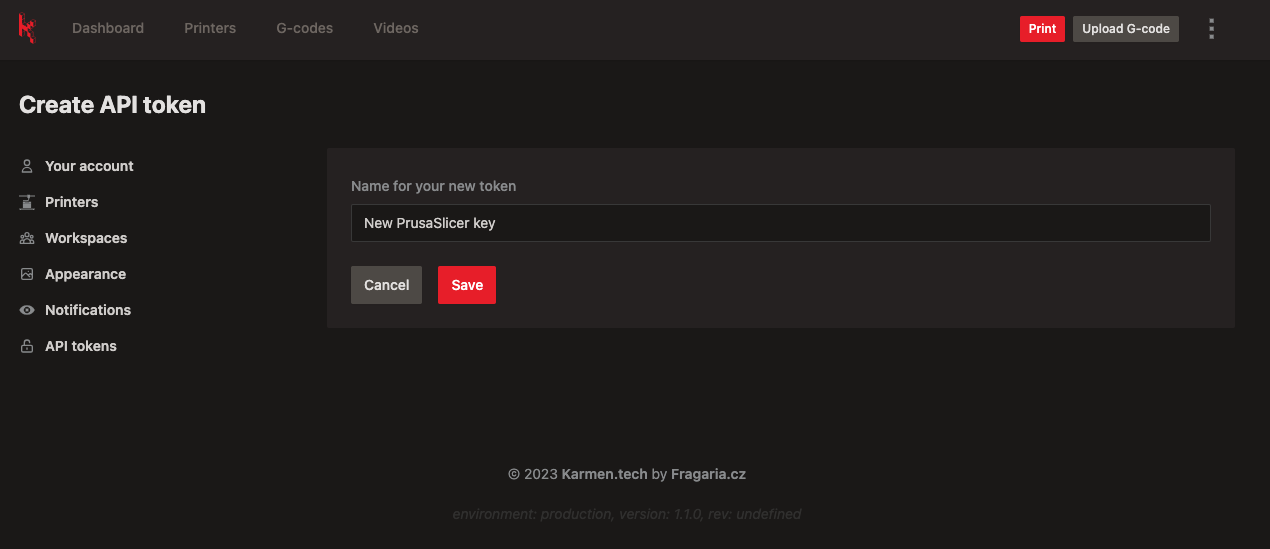
Tip: In the field with the name of the key, enter a text from which you will know in the future what the given key is used for.
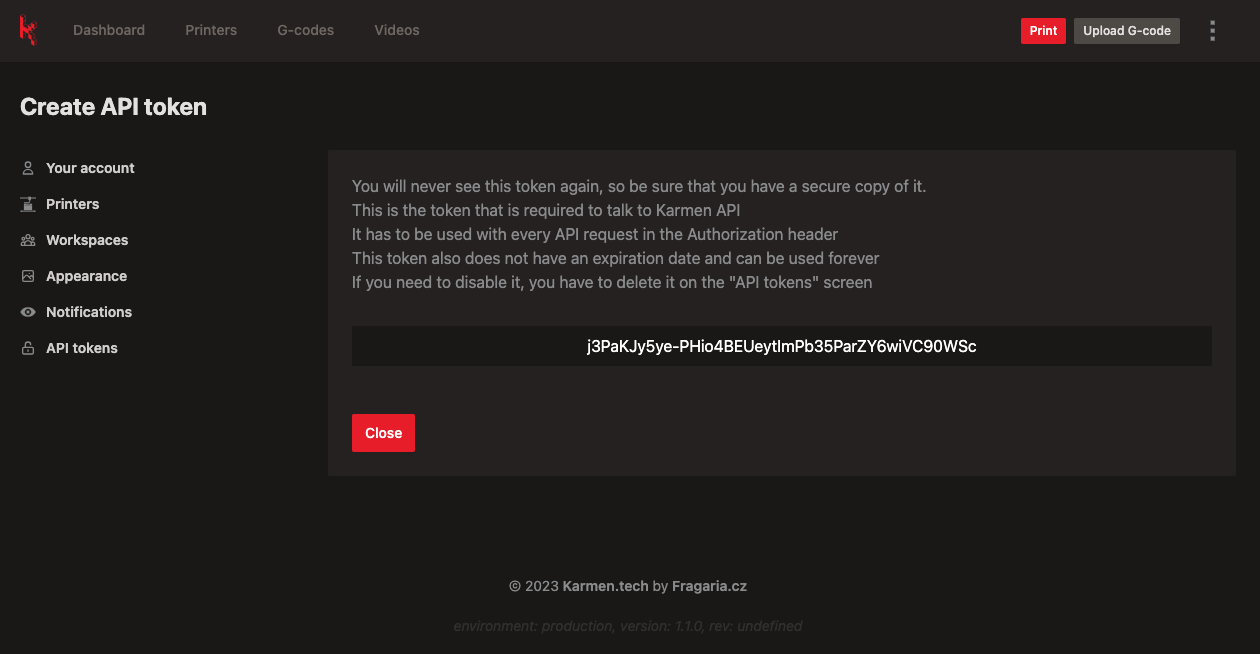
Copy API KEY and paste him into “API Key/Password” in PrusaSlicer.
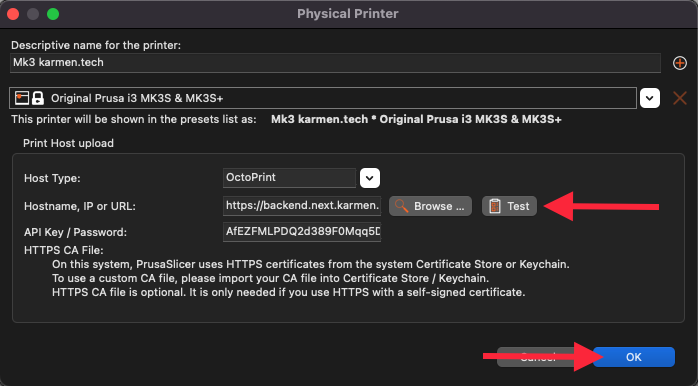
Connection test and physical printer save
You can check that all the information is stored correctly and the communication between PrusaSlicer and Karmen is working properly by clicking on the TEST button in the dialog.
If everything is fine, close the PrusaSlicer dialog with the “OK” button, or repeat the entire action.
Sending Gcode to Karmen
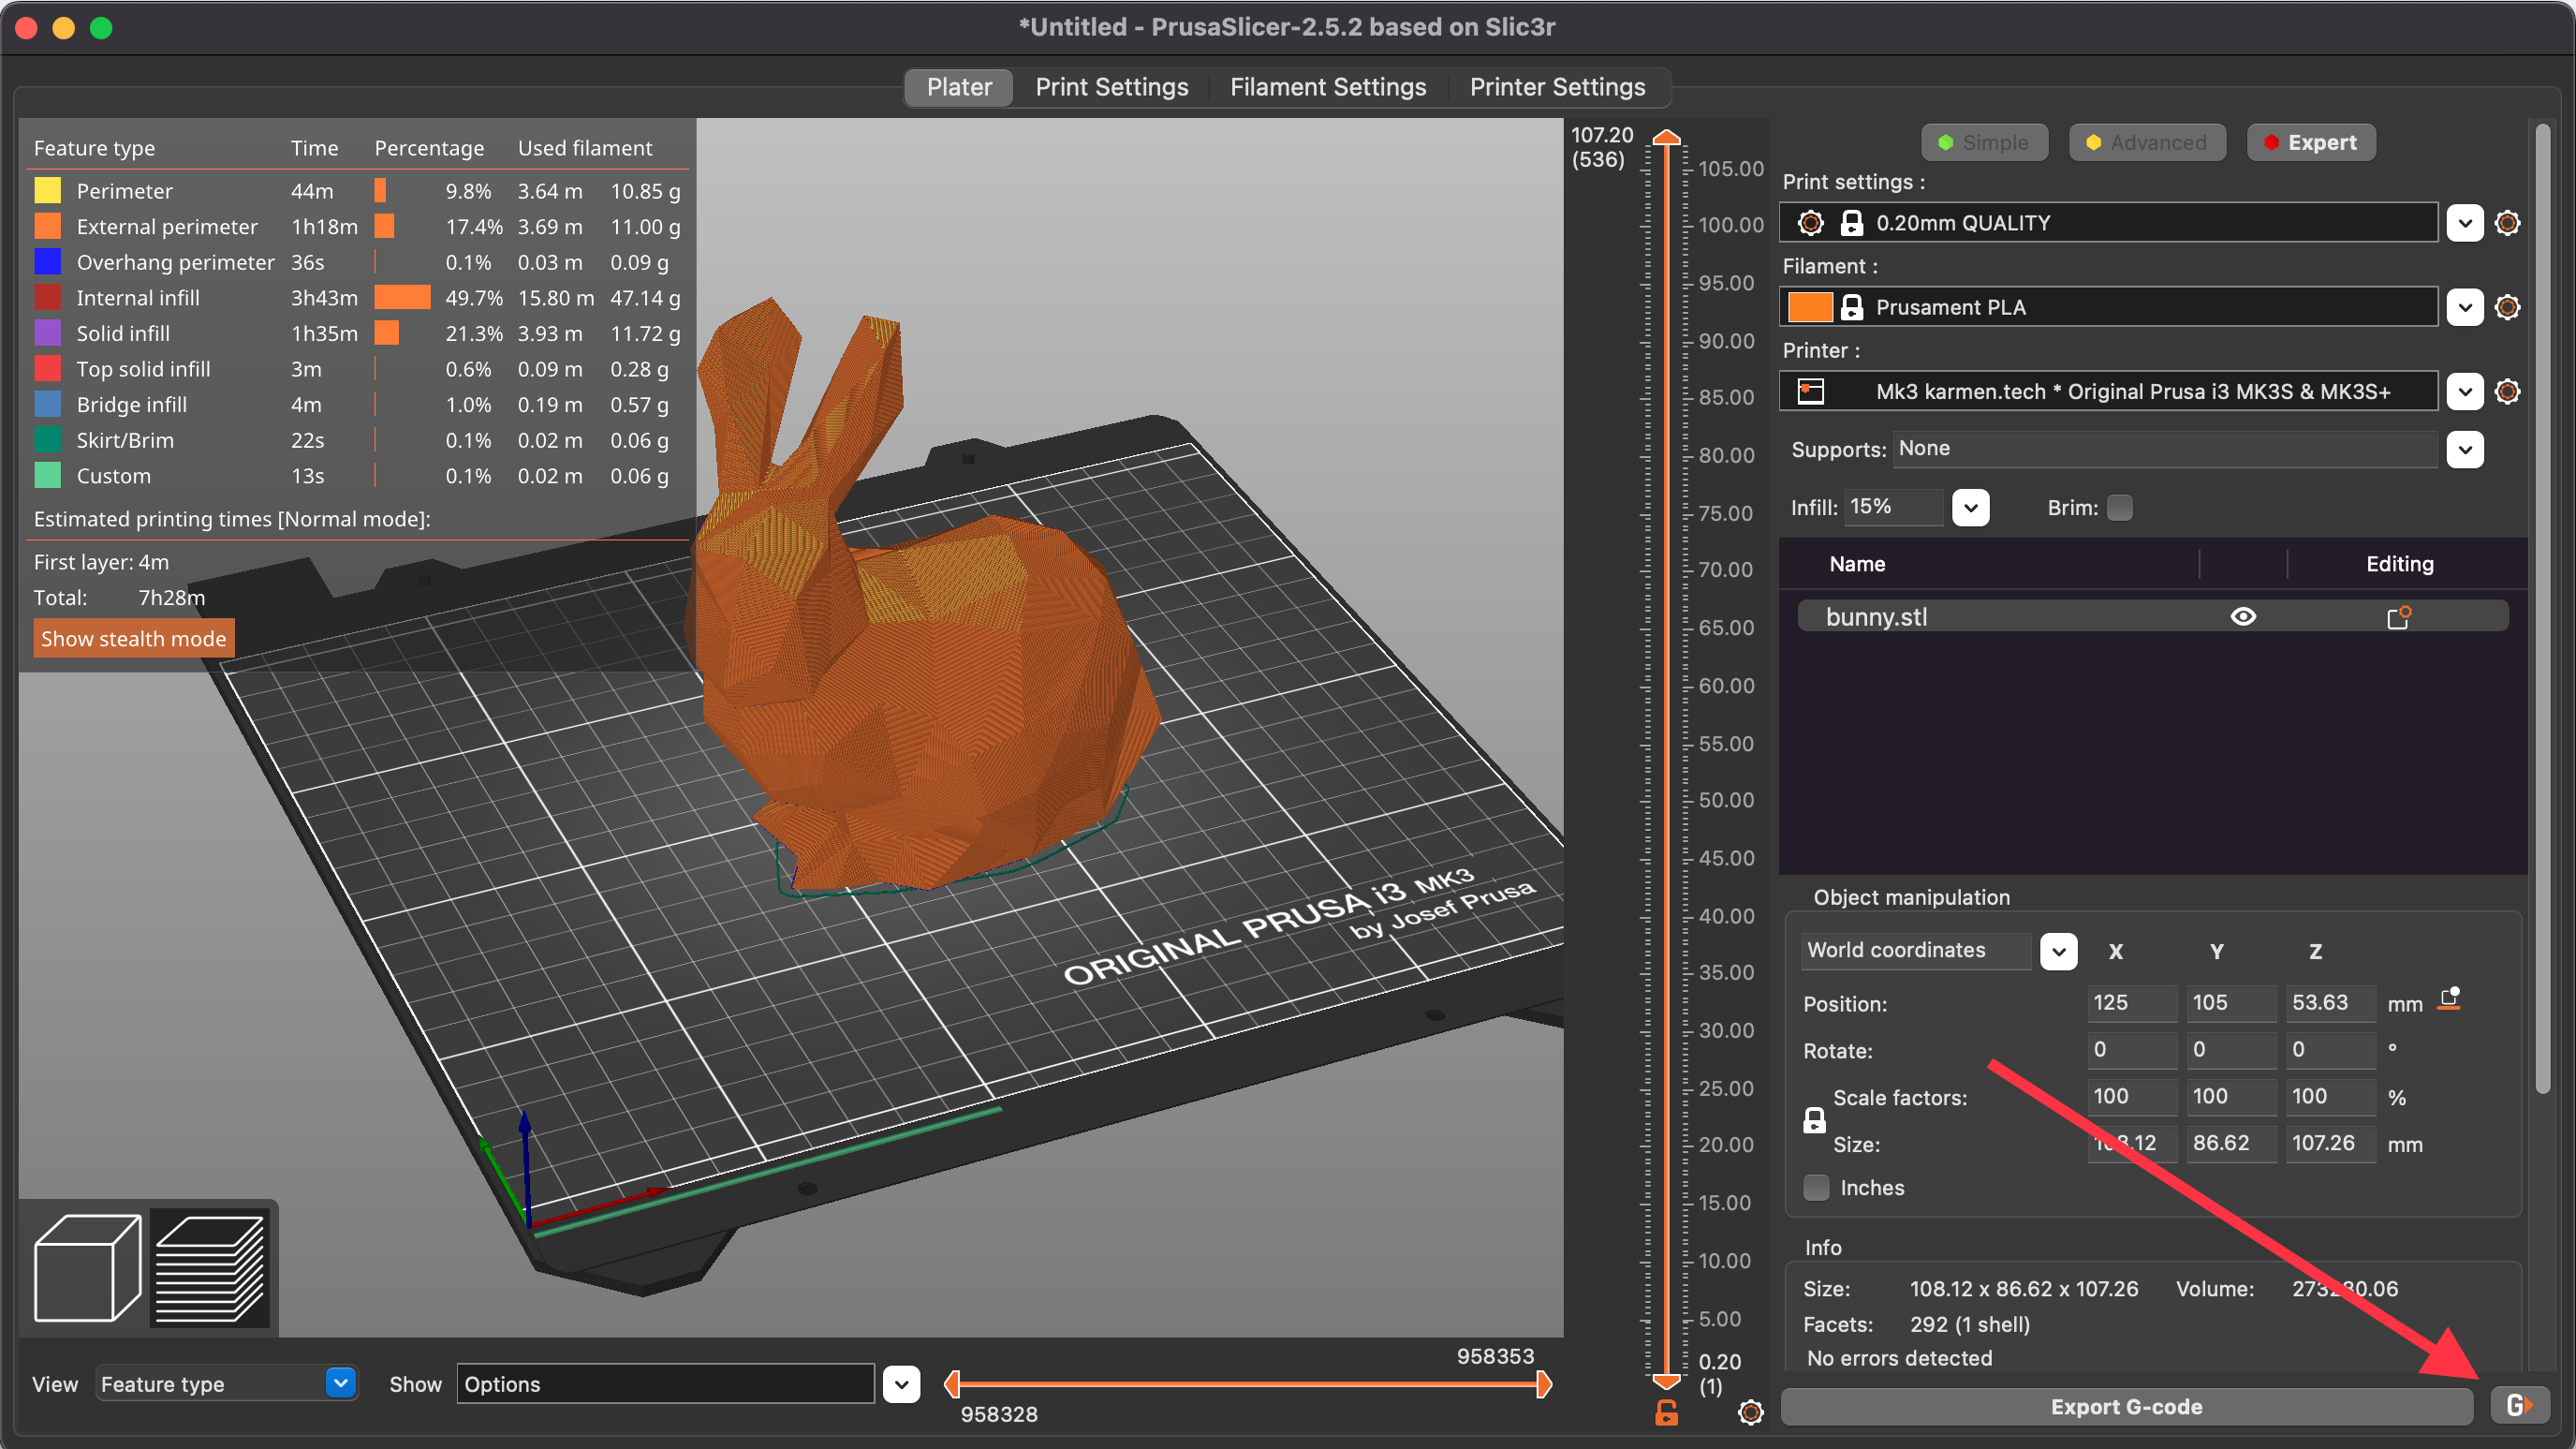
At this point you should have PrusaSlicer set up so that it is able to communicate with Karmen. When you have the model ready for printing, a new button appears in the lower right corner of PrusaSlicer for uploading the Gcode directly to Karmen.